Some old Bullshit...

Yak about stuff. Just stuff.
User avatar
Maddel
Posts: 1462
Joined: June 29th, 2017, 8:30 am

Some old Bullshit...

Ok folks here's the sequel to "A passage in time"... :o
Another rough write-up what happened to my Bug during the last few years.

Summer 2013

The Bug in June...
Image

Image


I was always bothered by the inaccurate and inadequate speedometer. So I dug up this spare from the parts hoard...
Image

...and had it revised and calibrated by Tacho Thomas.
On the left the previously used speedo, on the right the restored one - Thomas did a great job IMHO...
Image
User avatar
schwim
Site Admin
Posts: 1627
Joined: November 6th, 2013, 4:16 pm
Location: Coastal VA, US
Contact:

Re: Some old Bullshit...

wow, Thomas really knows how to make 'em look good :)

And what a beautiful ride!
User avatar
Maddel
Posts: 1462
Joined: June 29th, 2017, 8:30 am

Re: Some old Bullshit...

schwim wrote: September 28th, 2021, 4:22 pmwow, Thomas really knows how to make 'em look good :)
Besides the nice stock look the revised speedometer is calibrated very well too - speed indication is quite accurate.
Unlike with the stock one which tends to display "upbeat" speeds. :D
User avatar
Maddel
Posts: 1462
Joined: June 29th, 2017, 8:30 am

Eliminate the fuel smell...

Autumn 2013

The infamous fuel smell in the trunk... The Bug always had it but I put the matter off again and again.
So at length the day had come to tackle the fuel "system".

Below the fuel tank are the remains of the Bug's original color L90D "pastellweiß"...
Image

Touched up a few minor defects in the fuel tank's paintwork...
Image

Image

Probably the main reason for the fuel smell: a wrinkled seal at the filler neck.
I never took these parts apart before so I assume the seal was mounted like this at the factory...
Image

Image

Fuel tank painted and back in the trunk. All soft lines, tubes and clamps renewed...
Image

Image

Image

While at it I mad a new bracket for the stereo too...
Image

Finally the fresh air box went back in...
Image

Another reason for the fuel smell: a brittle and torn gas cap seal.
I replaced the stock seal with an o-ring which works great to this day.
Image

Moved the fuel filter from the engine bay to the front under the tank...
Image

Renewed all soft fuel lines and clamps in the engine bay. Also I completely revised the generator.
Unfortunately all the pics I took during that process are gone since I managed to loose my digicam during a local "Volksfest"... :roll:
Image
Last edited by Maddel on November 4th, 2021, 3:09 pm, edited 1 time in total.
User avatar
Maddel
Posts: 1462
Joined: June 29th, 2017, 8:30 am

Spare wheel modification...

Winter 2013 / Spring 2014

Another issue that has been neglected for quite a while: the spare wheel.
The 5.5" wide Porsche rim with a 165/80 tire mounted fit the spare wheel well not a quarter as good as the stock one.
The fit was super tight and the trunk liner did not line up flush. Even worse, you have to deflate the tire to get the wheel out.
Well... A flat spare wheel... What is it good for?

Image

So I was in need of a 4" wide 5x130 bold pattern steel rim...
Fortunately the Bug's stock spare wheel rim and the Porsche steel rim had center disks of the same diameter.

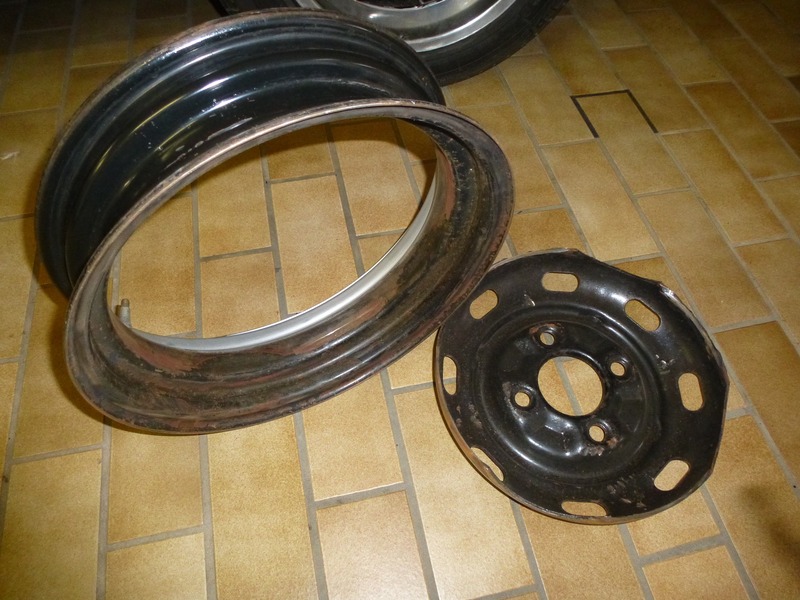
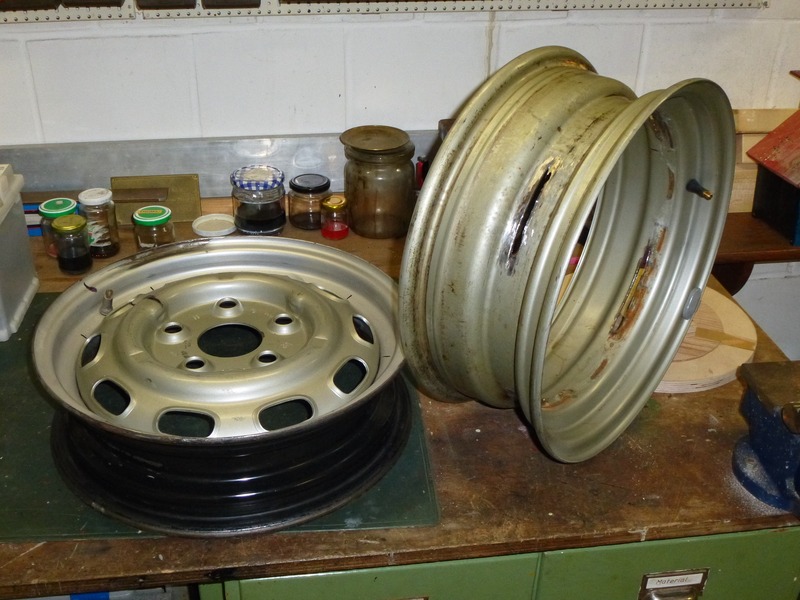
VW Spare wheel parted: center disc cut out, barrel intact...
Image

Image

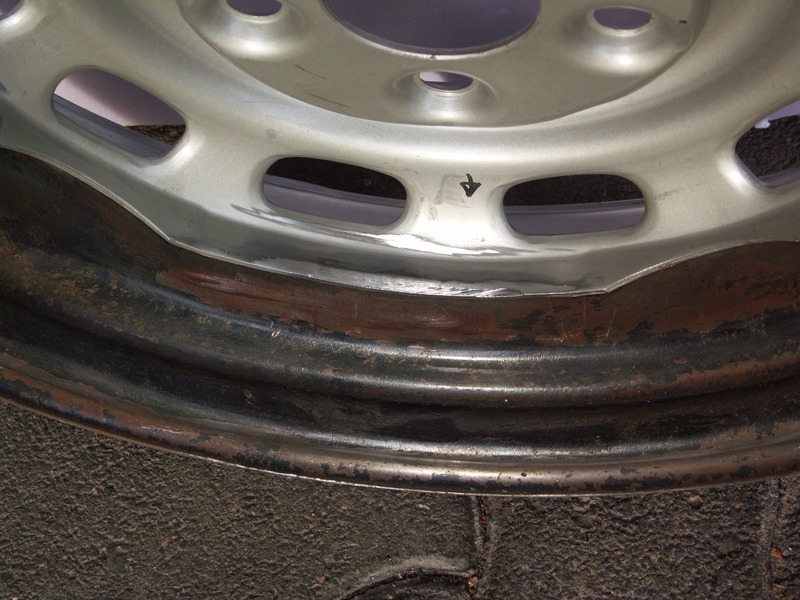
Porsche wheel parted: barrel separated, center disk intact and test fitted into the 4" VW barrel...
Image

Image

Image

Next step was to determine the proper offset and check true running...
Image

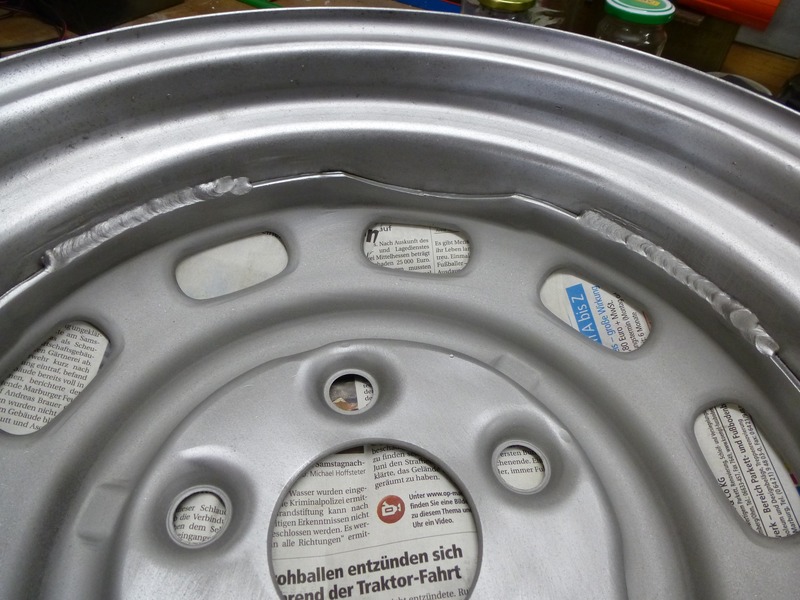
Welded and sandblasted...
Image

Image

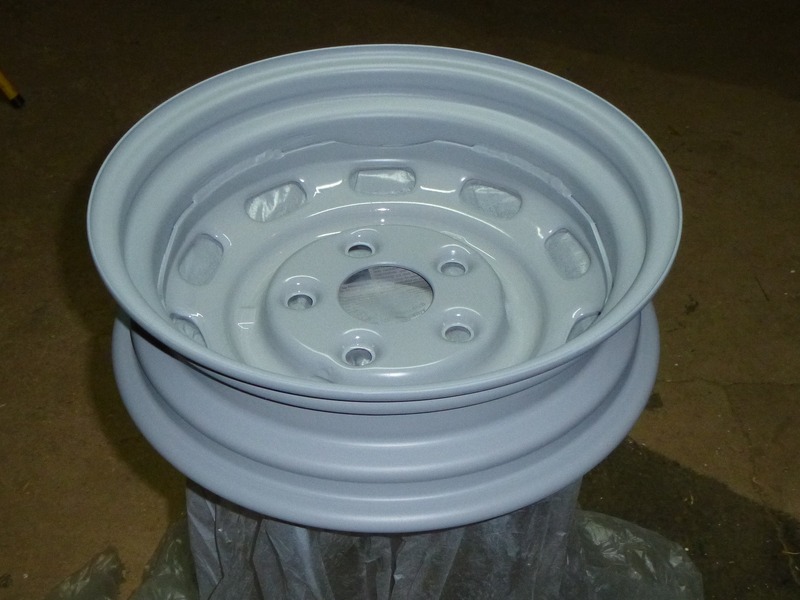
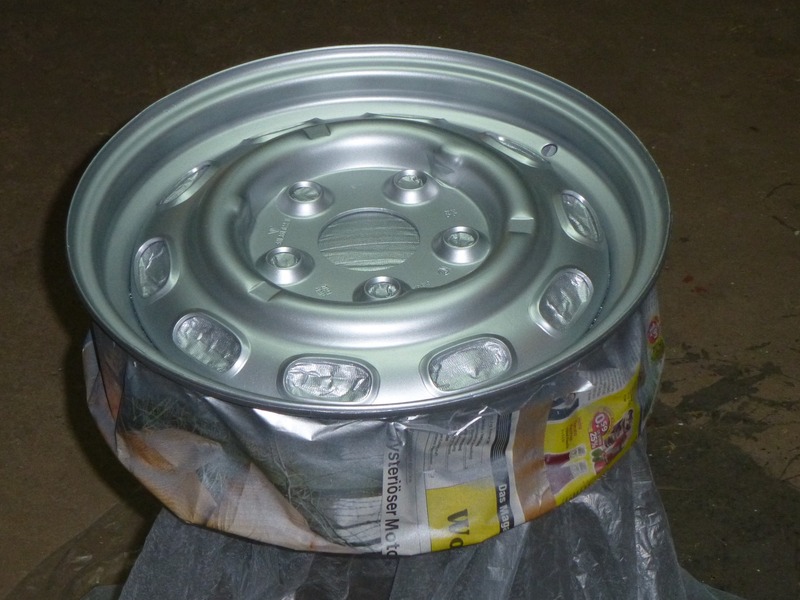
Applied some primer & paint...
Image

Image

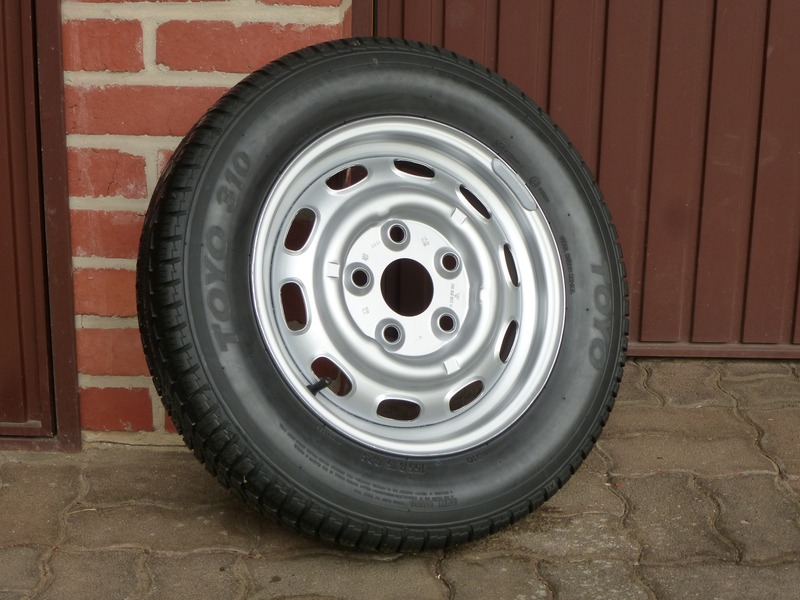
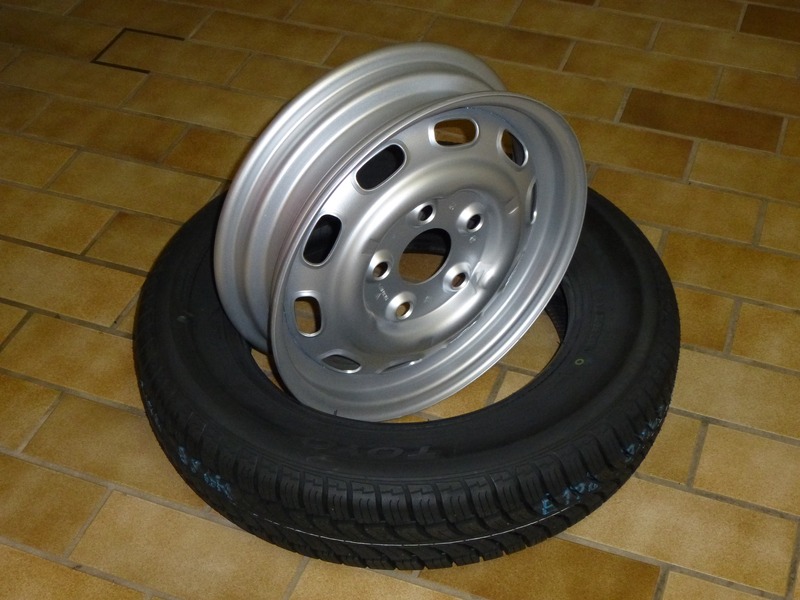
Voila! A 4" wide 5x130 Porsche lug pattern steel rim with a Toyo 310 155/80 R15 82S tire...
Image

Image

Looks great and ran like a charm during the test drive...
Image

Image

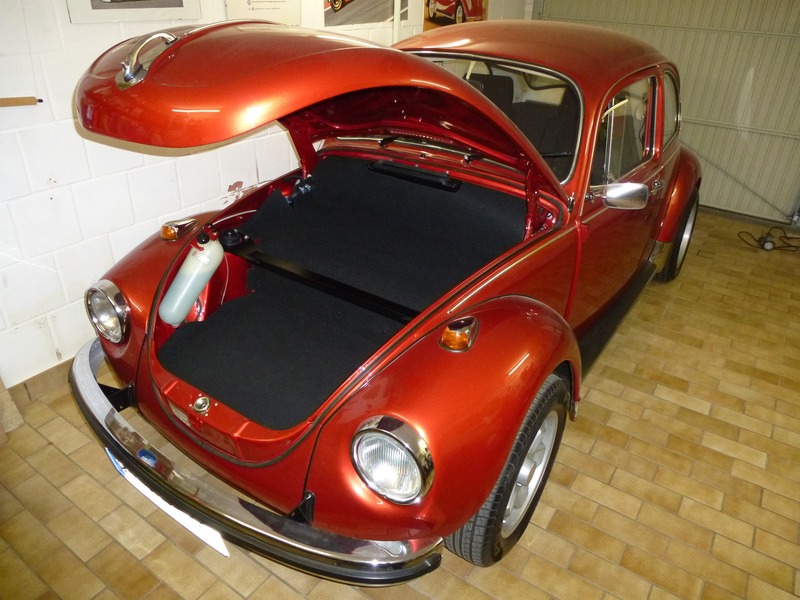
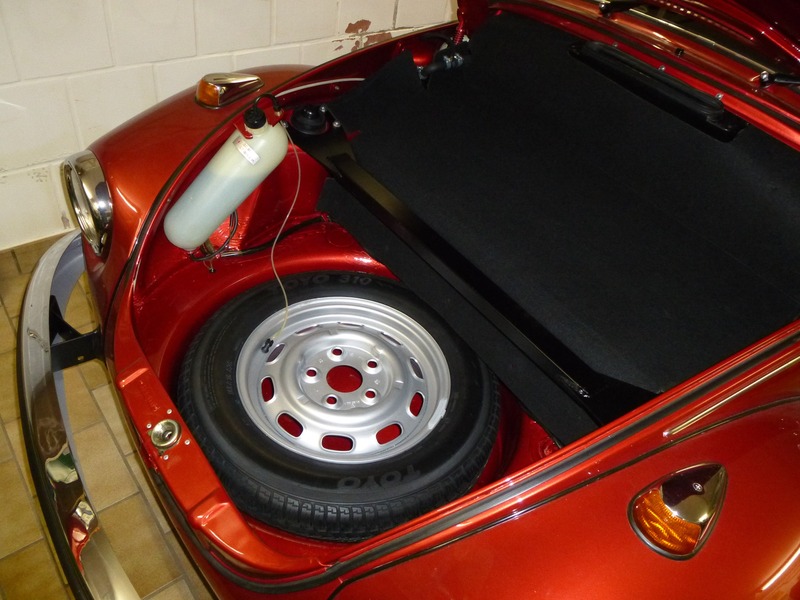
But most importantly: properly inflated so that the windshield washer works it perfectly fits the spare wheel well...
Image

Image
User avatar
schwim
Site Admin
Posts: 1627
Joined: November 6th, 2013, 4:16 pm
Location: Coastal VA, US
Contact:

Re: Some old Bullshit...

That wheel work is incredible! Were you able to break the welds and weld it back up at home? I always thought if it had to do with a wheel, I'd need to find a machine shop to like spin it up and use various calipers to make sure it didn't wobble off down the road.
User avatar
Maddel
Posts: 1462
Joined: June 29th, 2017, 8:30 am

Re: Some old Bullshit...

schwim wrote: November 8th, 2021, 11:24 amWere you able to break the welds and weld it back up at home?
Yes it was all done at home except for the sandblasting.
The fact that the center discs of the different wheels had the exact same diameter made it possible in the first place.
I used an angle grinder to separate the center disk from the barrel.
To keep the VW barrel intact I cut and ground away the center disc area.
In contrast the Porsche barrel was sacrificed do keep its center disc intact.
After carefully trimming the parts the VW center disk fit the Porsche barrel snug (tight fit).
That's why offset and true running could be checked on the car by simply spinning the not yet welded rim.
After that the welding was done by my then 73 years old dad who is a certified master craftsman metalworker.
He knows his stuff whereas my welding skills are close to zero... :roll: :lol:
But we are talking about a rarely (hopefully never) used spare wheel here.
I never would do this modification to a regular daily used rim.
User avatar
schwim
Site Admin
Posts: 1627
Joined: November 6th, 2013, 4:16 pm
Location: Coastal VA, US
Contact:

Re: Some old Bullshit...

Maddel wrote: November 8th, 2021, 3:20 pmAfter that the welding was done by my then 73 years old dad who is a certified master craftsman metalworker.
He knows his stuff whereas my welding skills are close to zero... :roll: :lol:
Dein Vater ist wunderbar und sein arbeit ist sehr beeindruckend!

I had to look up "impressive", I couldn't remember that one :)

That is amazing though, both his and your work looks phenomenal. I would trust his welding and your fitting of the parts more than the inexpensive stuff we buy nowadays.

The trunk space looks absolutely fantastic. You're a master at your craft as well :D
User avatar
Maddel
Posts: 1462
Joined: June 29th, 2017, 8:30 am

Re: Some old Bullshit...

Thanks for the kind words Sir!
Now I have to be careful not to get too big for my boots... :)

Good to see you're persistently into learning German.
Unlike you I had thrown in the towel long ago... :roll:
User avatar
Maddel
Posts: 1462
Joined: June 29th, 2017, 8:30 am

Re: Some old Bullshit...

December 2014

During the driving season in summer I experienced some issues with sluggish and jamming window regulators.
In a fit of lunacy I decided not just to revise the door internals but the Bug's whole interior!
That project mushroomed into a two year undreamed-of enormity.

Image


Getting the seats out. First plans for the rear speaker box were to replace it with an even larger one.
That idea changed during the project in favor of a more stealth hi-fi system and a stock looking luggage area...

Image

Image


Door panels off and here we have the original 1970 moisture barrier with the PO's cutouts for the speakers.
Why the hell didn't I replace that plastic foil back in '89?

Image


That almost 45 year old foam 'seal' looked not too bad at first sight.
Then I grabbed it and it started to crumble and disintegrated into sort of a semifluid goo...

Image


The bottom of the doors still looked quite good. Even some of the cavity wax applied in '89 still existed.

Image

Image

Image
Post Reply